Knowledge Base
Search by either entering keywords or by selecting a product.
Adding a TeraStation NFS Share to ESXi 5.x
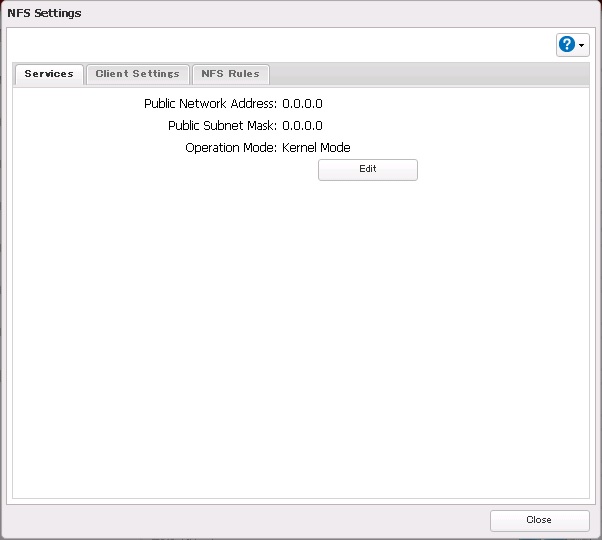
- From the TeraStation user interface make sure the slide switch next to NFS is blue to indicate that NFS is enabled. Click the configuration widget next to the slide switch to set options for NFS.

- On the services tab make sure “Operation Mode” is set to “Kernel Mode”. If it is not, click the “Edit” button to change. Once correctly set click the “Close” button. NOTE: This option is not available on all models.
- Back in the main screen of the user interface, click the configuration widget next to “Folder Setup” to create the new NFS share.
- From the “Shared Folder List” click the “Create Folder” button on the upper left to create the new folder.

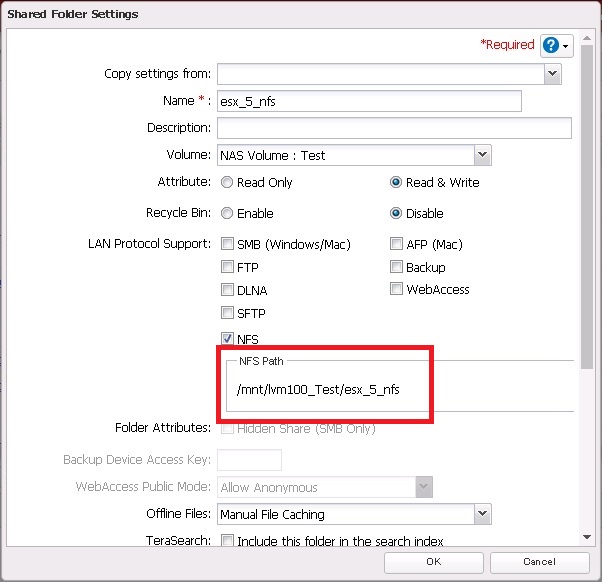
- On the new folder dialog box make sure the NFS option is checked. In this case we have disabled the recycle bin (recommended) and turned off all other protocols. Note that the NFS path is shown. Copy this information as it will be needed later.
- In the ESX interface select the host, then go to the “Configuration” tab and select “Storage” from the “Hardware” box on the left. On the right hand side click the link to “Add Storage”.

- Choose the radio button for “Network File System” and click “Next”.

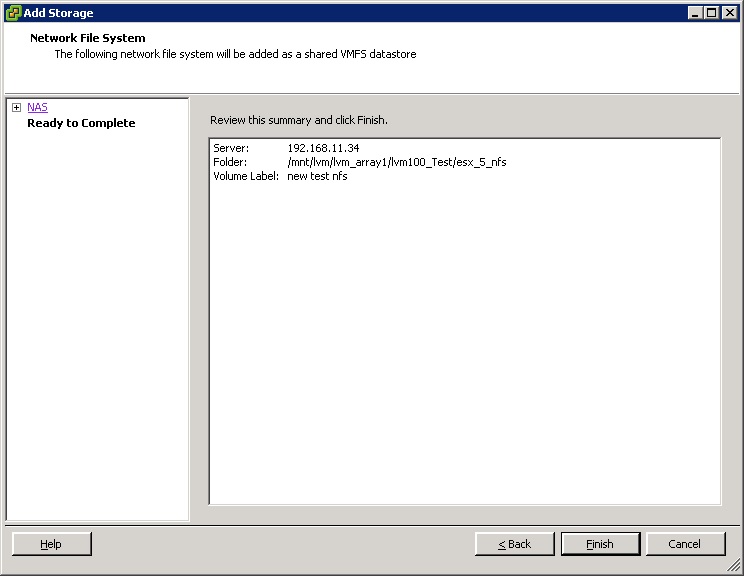
- For “Server” enter the IP address of the TeraStation. In “Folder” enter the path that was from the shared folder creation earlier. Give the datastore a unique name and click “Next”.
NOTE: Manually inputting the mount path is required, copying the mount path from TeraStation WebUI will bring along web encoding which will cause mounting failure.

9. Verify the information is correct in the dialog box and click “Finish”.
10. The new datastore should now be listed along in the “Storage” area. The new datastore is ready.
