Knowledge Base
Search by either entering keywords or by selecting a product.
Cleaning a Disk in Windows 7 (or later) Using Diskpart
Note: An USB to SATA Adapter is required if not directly connecting the hard drive to a PC's SATA connector.
- Open Disk Management and locate the disk in question. In our example it will be disk 5. This is a 3 TB disk with an MBR partition table.

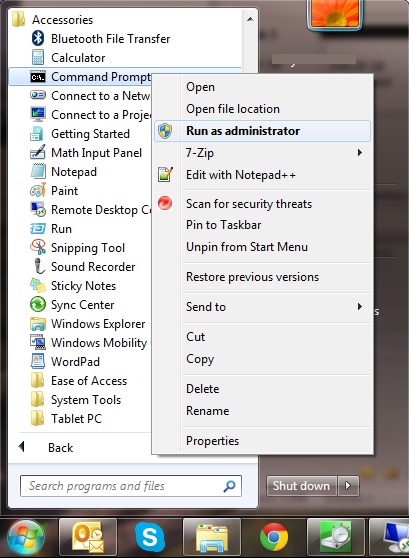
- Open the Start menu and go to "Accessories". Right-click on "Command Prompt" and choose "Run as Administrator".
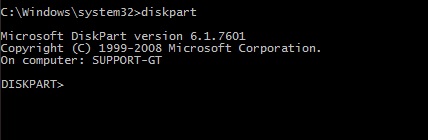
- At the prompt, type "diskpart" and hit Enter.
- At the diskpart prompt type "list disk". This will list all the hard drives in the system. Note that disk 5 is the disk we need to clean. The free space indicated in diskpart means "space that is available for use on the drive but which does not have a volume defined". If there were a volume defined on this drive it would likely show zero free space.
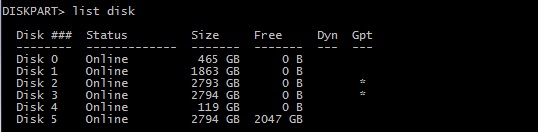
- At the diskpart prompt, type "select disk x", where x is the disk number that you want to clean. In our example, that is disk 5.

Note: Make absolutely certain you have selected the correct disk. If you have selected a drive which contains data that you want to keep and you proceed beyond this point, that data will be erased.
- At the diskpart prompt, type "clean" and hit Enter. You will not be given a chance to opt out. Once you hit Enter, the disk will be erased.

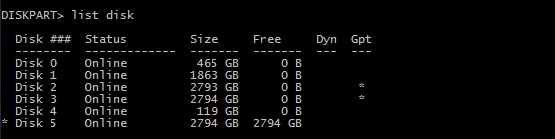
- If you type "list disk" again you will see that the disk that was cleaned now shows that all space on the drive is free. That means there are no volumes defined on that drive.
- If we go back and look at the disk in Disk Management, it should now show as "Unknown" and "Not Initialized. This disk is now ready to be used for a new application.
