Knowledge Base
Search by either entering keywords or by selecting a product.
Configuring Media Server on a Buffalo AirStation
The AirStation includes a built-in media server that can stream content to media players on the network. A media server can be an attached USB drive or another NAS unit. If using another Buffalo NAS as the media server, make sure that it contains a media server shared folder.
- Connect the AirStation to a computer with an Ethernet cable and power both devices on.
- Connect the USB drive or NAS to the USB port on the AirStation. If using a NAS, make sure that there is a media server shared folder on the NAS.
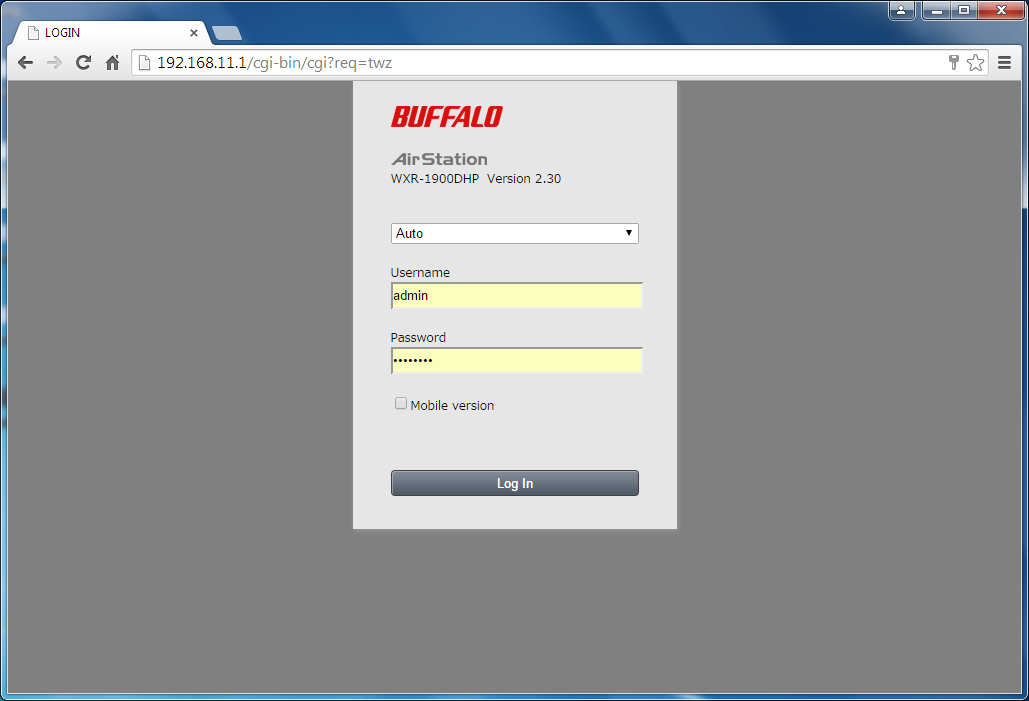
- Launch a web browser and enter the AirStation's IP address into the address bar. If you do not know the AirStation's IP address, check the setup card included in your AirStation's package, or use AirStation Configuration Tool to display it.
- Log in to Settings. The default username is "admin" and the default password is "password".
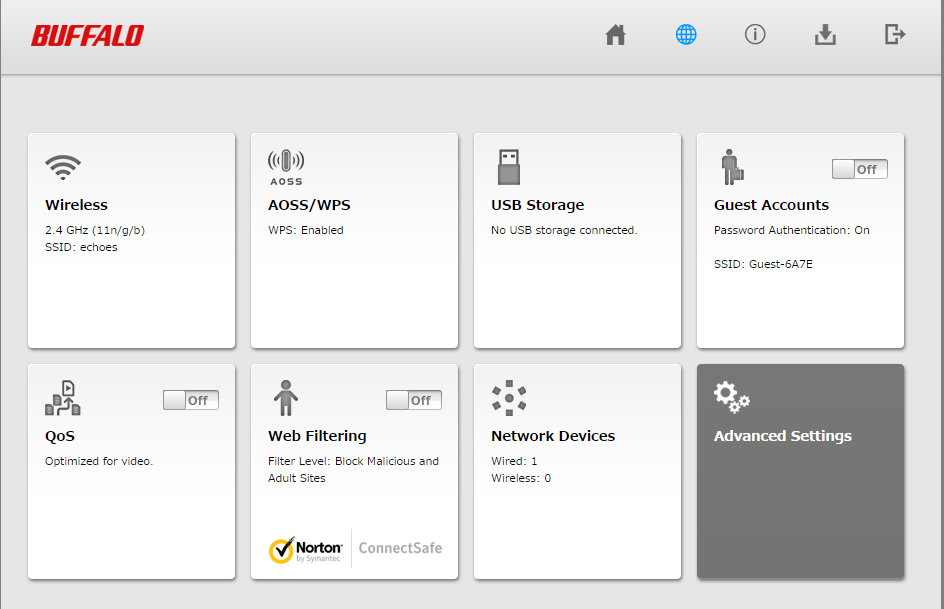
- Click the Advanced Settings tile.
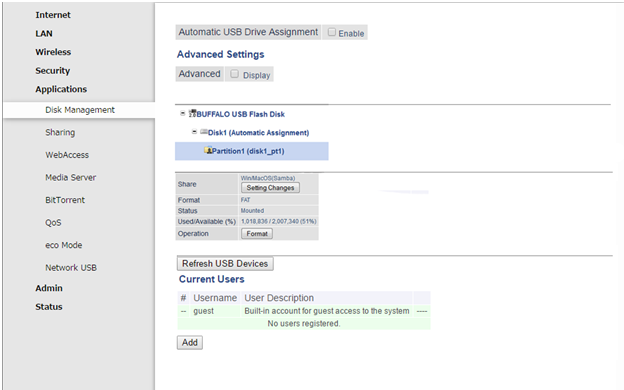
- Click on the "Applications" tab, then click on the "Disk Management" subtab.
- If using a USB drive, uncheck Automatic USB Drive Assignment and click Apply. Otherwise, proceed to the next step.
- From the "Applications" tab, click on the "Media Server" subtab.
- Enable "Media Server" and click Apply down at the bottom.
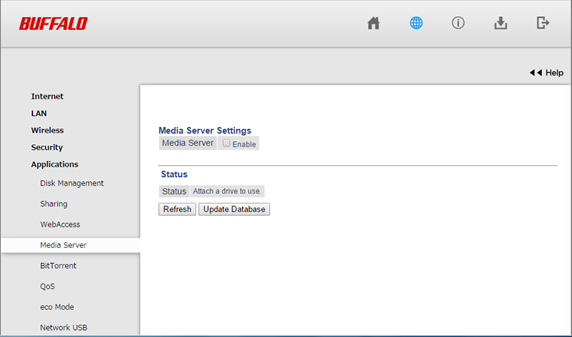
- Once the media server is enabled, you can click Refresh to update the list of displayed media devices, or click Update Database to update the contents of the media server if you had made any recent changes to it.
- Once you are finished, log out of Settings and close the web browser.