Knowledge Base
Search by either entering keywords or by selecting a product.
Configuring the iSCSI Initiator in Windows Server 2008
- Click Start, go to "Administrative Tools" and click iSCSI Initiator.

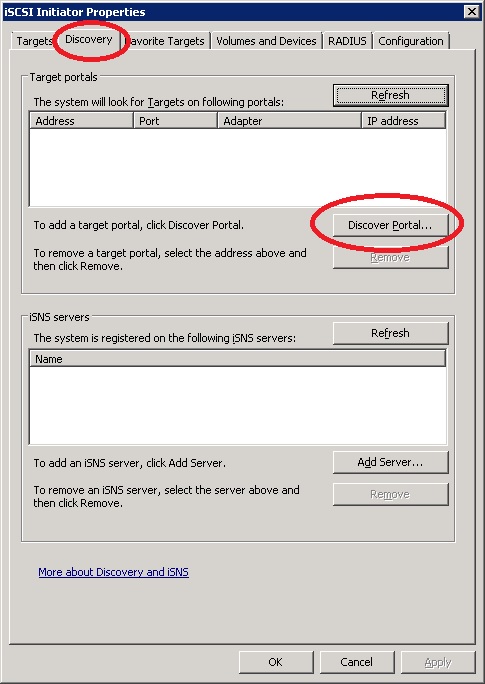
- From the iSCSI initiator property sheet, click the "Discovery" tab and click Discover Portal....
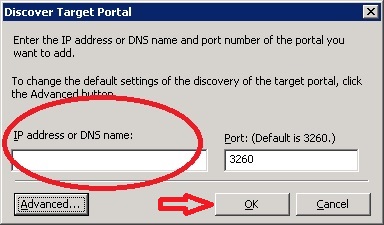
- Type in the IP address for the TeraStation. Leave the port number at 3260 (this is the default TCP port for iSCSI) and click OK. If you get an error, double-check the IP address and if necessary remove the portal and try again.
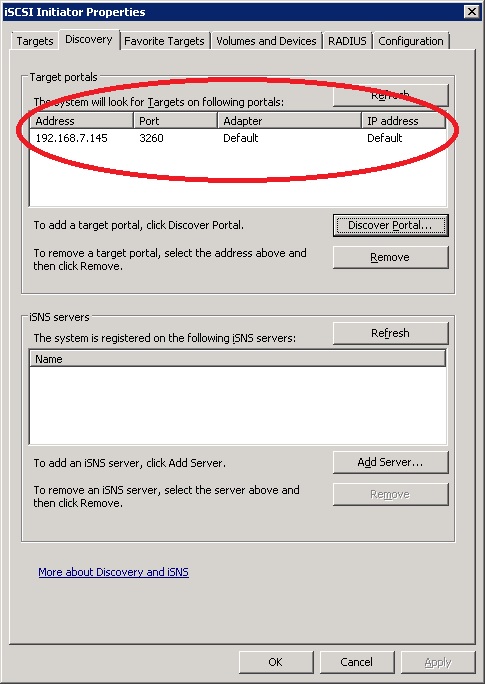
- The IP address should be listed in the window.
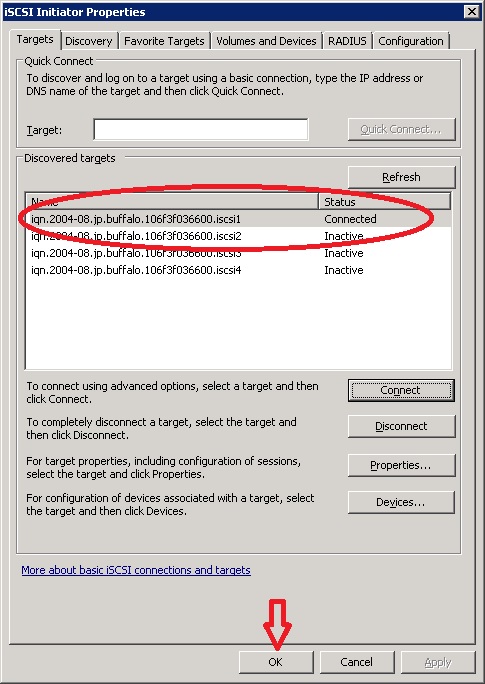
- Click the "Targets" tab. This should now list all iSCSI volumes available on the TeraStation. Select the one you want to use and click Connect. Note: A single iSCSI volume cannot be used by more than one Windows host. Doing so will result in data corruption!

- Check the box to enable multi-path. The first box should be selected by default. Click OK.

- Verify that the selected volume now shows "Connected". Repeat steps 4-6 for all volumes to be used by the server and then click OK. The iSCSI volumes should now be connected and working. now we need to create partitions usable by Windows.
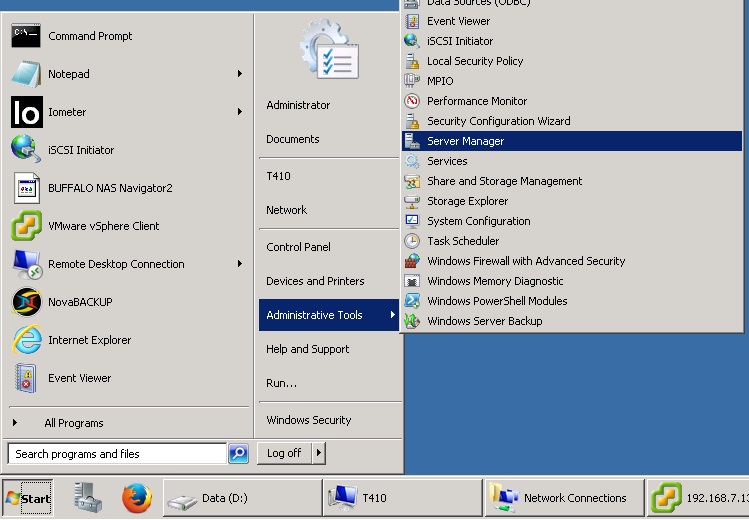
- Click Start, go to "Administrative Tools" and click Server Manager.
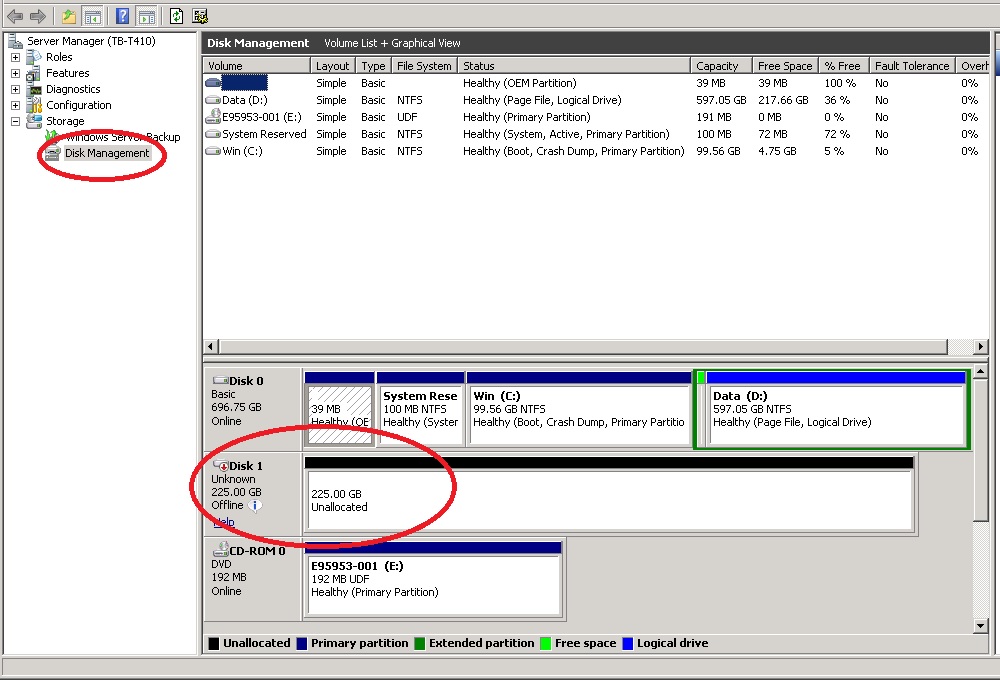
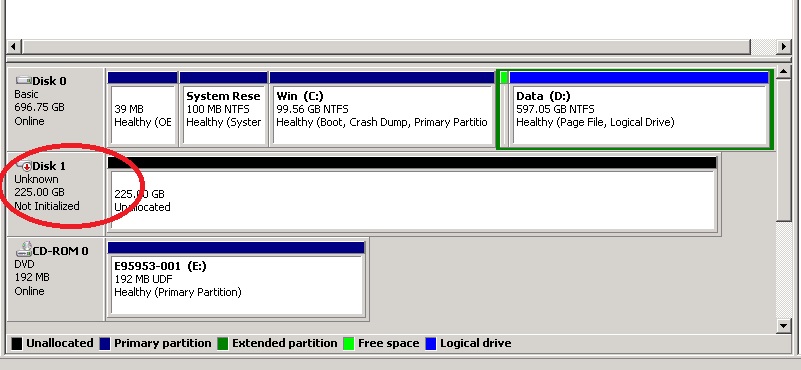
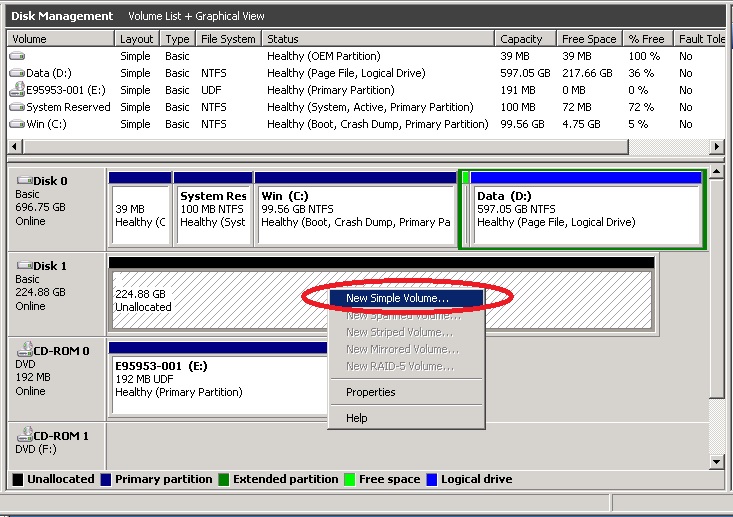
- Expand the "Storage" category and click Disk Management. The new disk (or disks) should show up as "Unknown", "Offline" and "Unallocated".
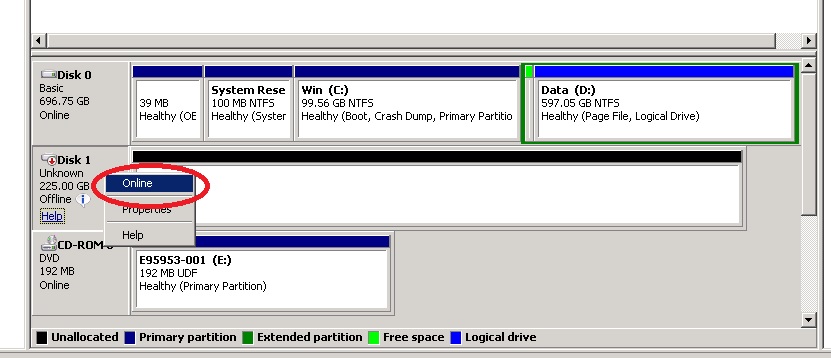
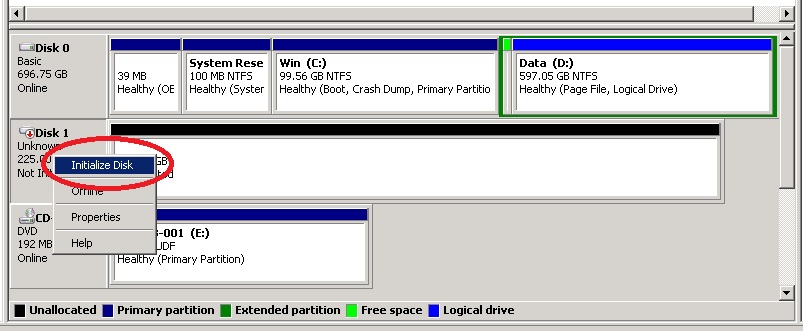
- Right-click on the gray box to the left containing the disk number and click Online.
- The disk should now be shown as "Unknown", "Not Initialized" and "Unallocated".
- Right-click on the gray box to the left containing the disk number and click Initialize Disk.
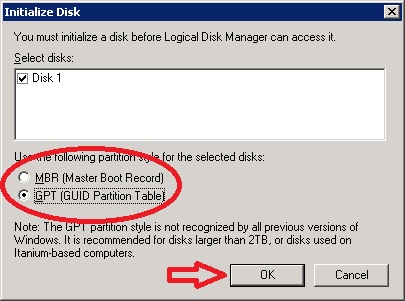
- In the "Initialize Disk" dialog box you can select between "MBR" and "GPT". Click OK when finished. Note: If the disk is larger than 2TB, you must select GPT or you will not be able to use the entire disk. For disks smaller than 2TB, either option may be used, but please bear in mind that if you need to increase the size of the disk beyond 2TB in the future, you cannot convert from MBR to GPT without deleting the entire contents of the disk!
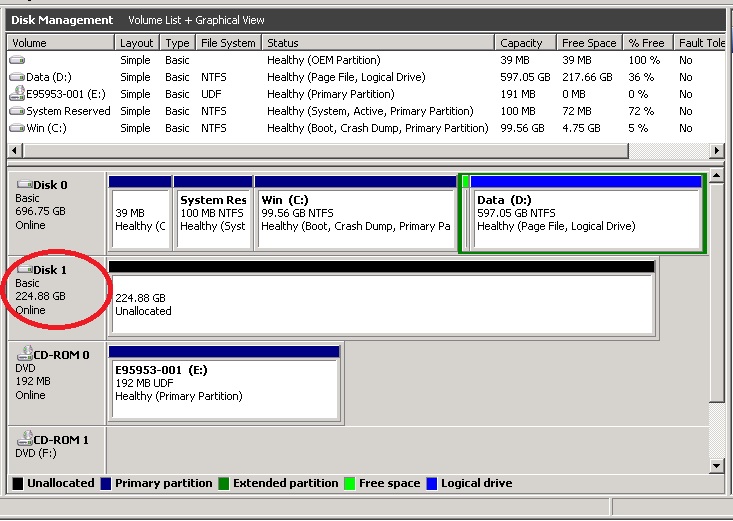
- The disk should now be shown as "Basic", "Online" and "Unallocated".
- Right-click on the white area of the unallocated disk and select "New Simple Volume..."
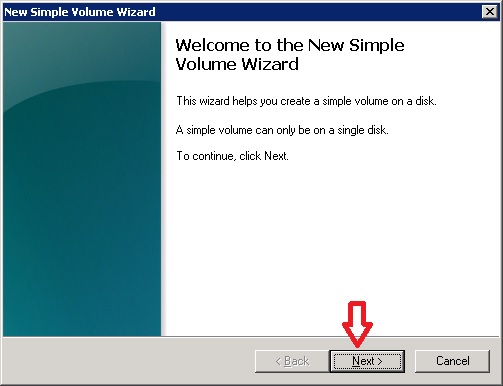
- The "New Simple Volume Wizard" will launch. Click Next.
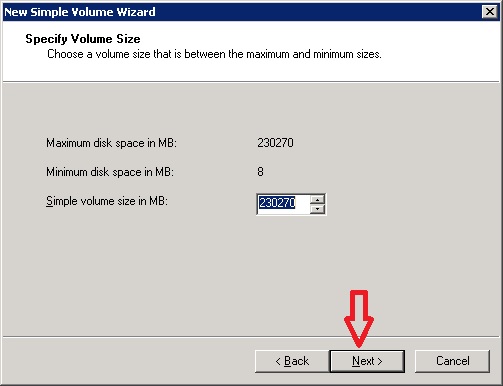
- Unless absolutely necessary, leave size at the default (the entire disk) and click Next.
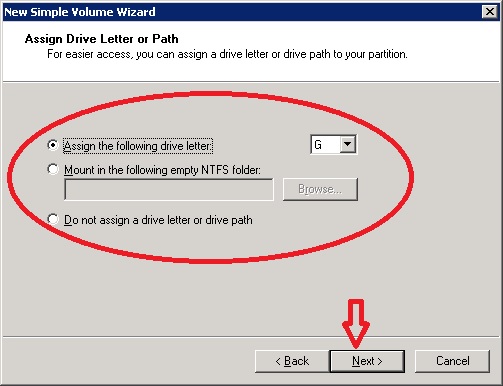
- If desired, you can change the drive letter. Otherwise click Next.
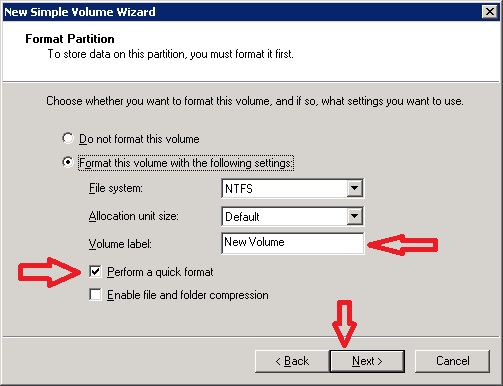
- Create a volume label if desired and make sure the option is selected to perform a quick format. Click Next. Note: Unless there is a very specific reason to do so, do not change the allocation unit size!
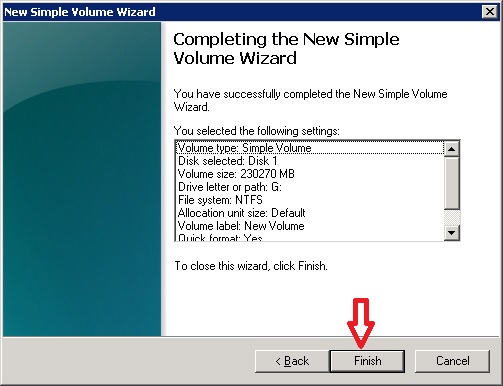
- Verify that all information is correct and click Finish.
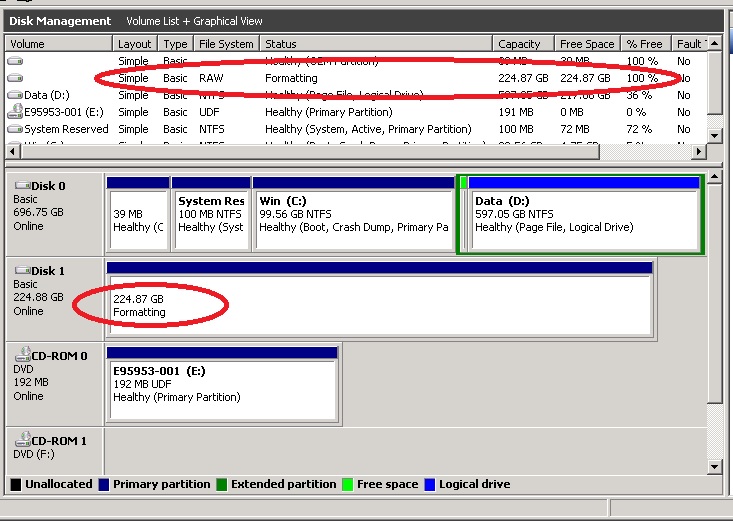
- The new volume should now be shown as "Formatting" in both the upper and lower panes. The larger the volume, the longer this process will take.
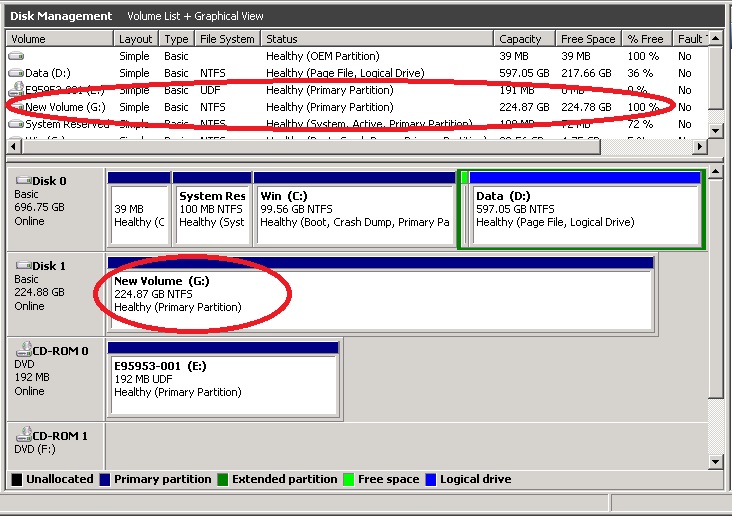
- Once finished the volume should appear as a healthy NTFS volume with the volume label and driver letter that were selected earlier.
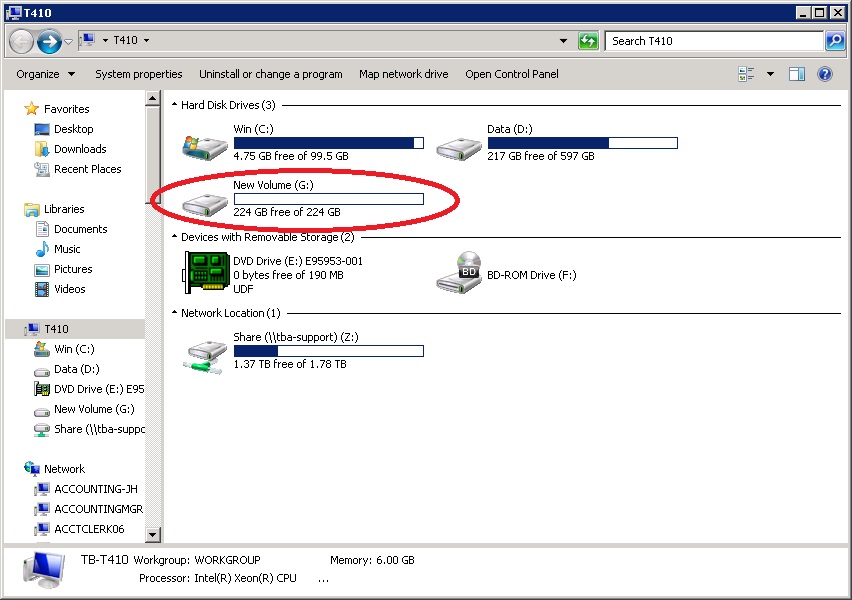
- Verify that the drive shows up correctly in Windows Explorer and the process is finished.