Knowledge Base
Search by either entering keywords or by selecting a product.
Initial setup and configuration of an LS520D
For more information consult the user’s guides available at http://d.buffalo.jp/LD520D/.
- Connect the LinkStation to your network using the supplied Ethernet cable.
- Plug in the AC adapter and connect to the LinkStation.
- Power on the LinkStation by moving the switch on the rear of the unit to “On”. The power LED should begin blinking white. Once the LED is solid white the LinkStation is booted and ready to be configured.
- Download and install the latest version of NAS Navigator for Windows or Mac. NAS Navigator is available from our website at https://www.buffalotech.com/support/download.
- Open NAS Navigator. The LinkStation should be displayed.
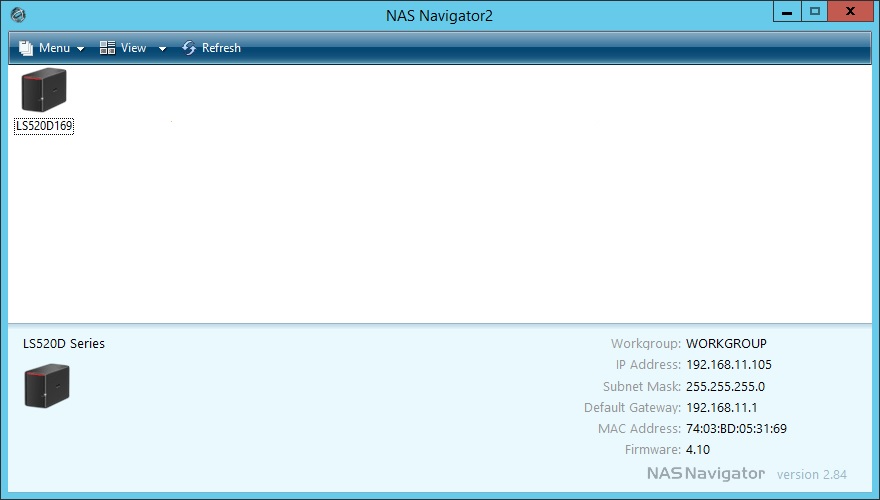
- Right-click on the LinkStation and choose “Settings” from the pop-up menu. This should launch the settings in your default web browser.

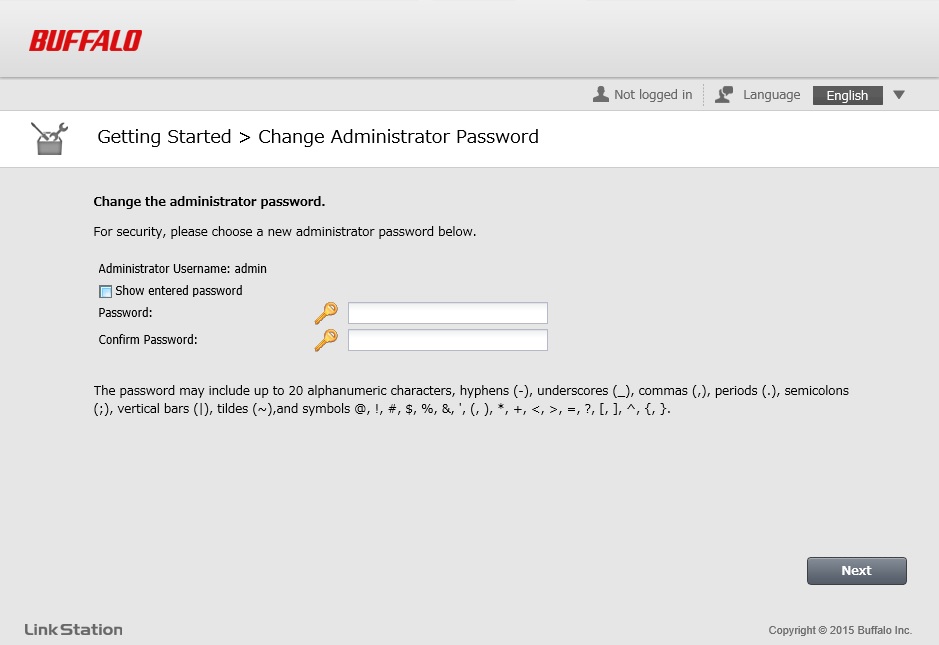
- The first step is to set the administrator password. The administrator username is “admin”. The admin password cannot be “password”.
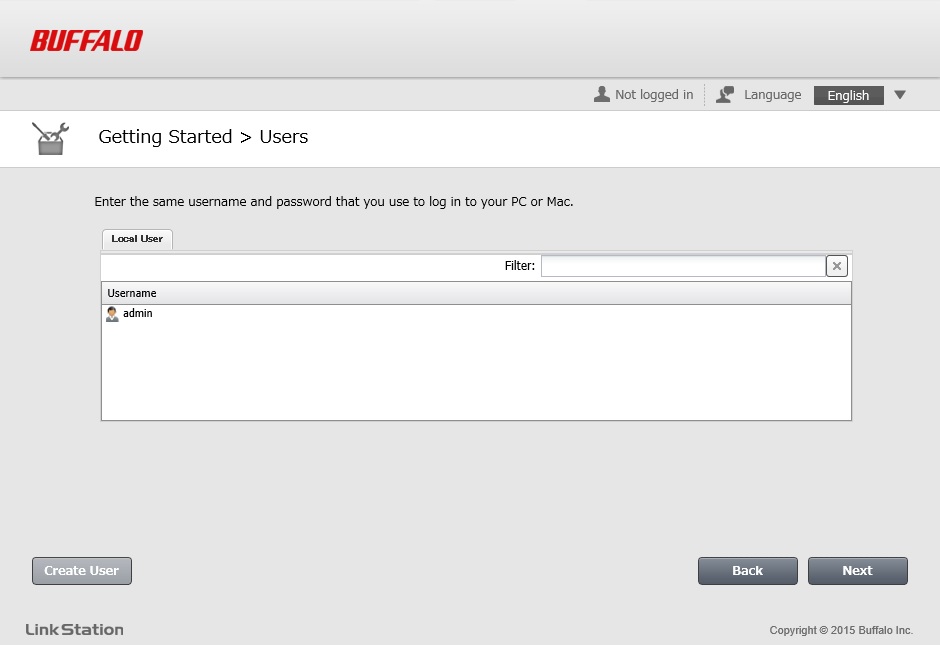
- You may create more users at this time if desired. New users can always be added later through the settings for the LinkStation.
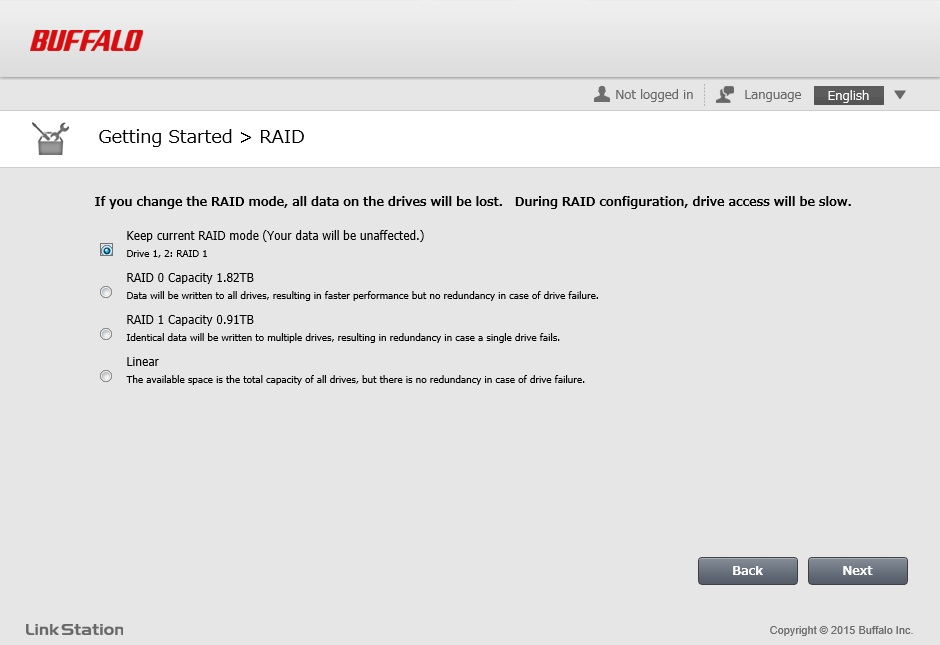
- Select the RAID type. The default is RAID 1, which will mirror the data on both drives. This will provide redundancy in the event of a single drive failure and will result in 50% of the space on the LinkStation being used for redundancy. RAID 0 stripes the data across both drives and will result in 100% of the space being available but will result in total data loss in the event of a single drive failure. Linear mode will simply fill one drive at a time as data is saved to the LinkStation. This will also make 100% of the space available but will result in data loss in the event of a single drive failure. RAID 1 is recommended.
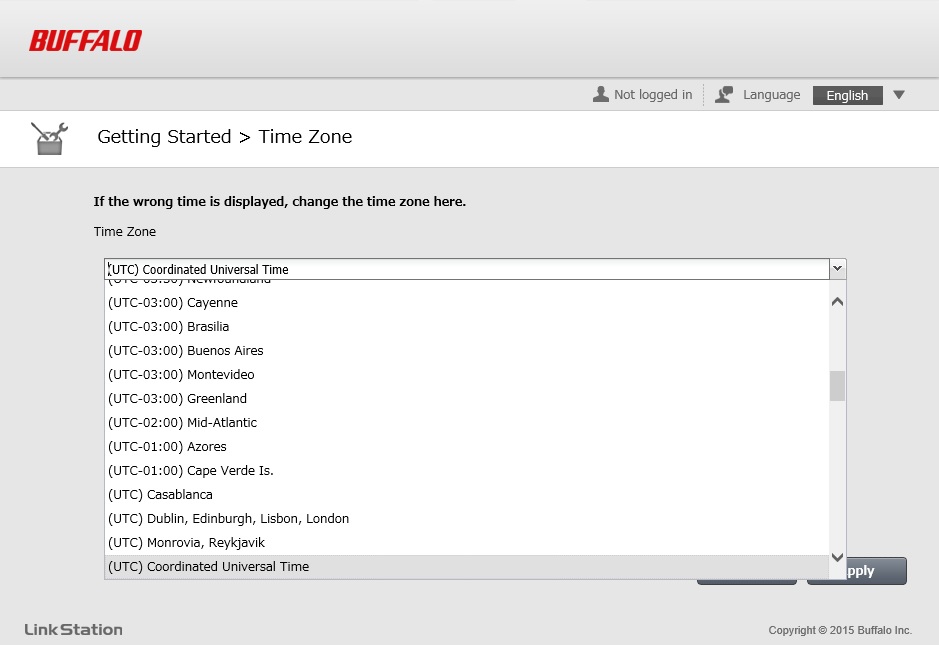
- Select your time zone.
- At this point the basic configuration is complete and the LinkStation is ready for use.