Knowledge Base
Search by either entering keywords or by selecting a product.
Setting up subfolder permissions on a TS5010/3020/3010/6000/5020/7010 series TeraStation
Applies to TeraStation 5010/3020/3010/6000/5020/7010 series
NOTE: This article assumes the TeraStation is using an Active Directory domain for user authentication. If not, be sure to pull the user/group lists from the TeraStation.
- First we’ll create a new folder with the correct options to allow subfolder permissions. Open the TeraStation user interface. On the “File Sharing” tab click the widget next to “Folder Setup”.

- On the “Shared Folder List” click the “Create Folder” button on the upper left.

- Give the new share a name and uncheck every protocol option except SMB. In the example we have also disabled the recycle bin.
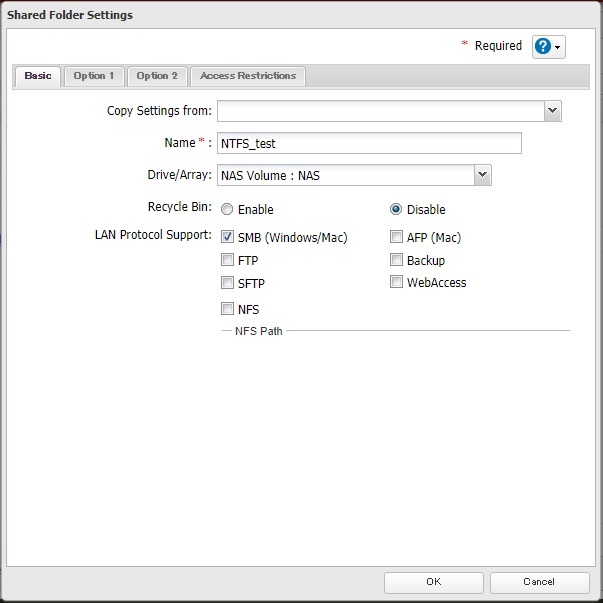
- Depending on the unit, click on the “Option 2” tab or scroll down on the main tab enable “Access Restrictions for Subfolders”. Once it is enabled, click the “OK” button. If it is grayed out, go back and make sure that only the SMB protocol is enabled for the folder.

- The new folder should now appear on the “Shared Folder List”. Click the “Close” button in the lower right.

- Log into Windows as an administrator. Navigate to the new share. We’ve gone ahead and added a new subfolder named “test”.

- Right-click on the subfolder and choose “Properties”.

- Click on the “Security” tab, then click the “Advanced” button.

- Click on the “Change Permissions” button.

- Click the “Add” button.

- Click the “Advanced” button.

- Click the “Find Now” button.

- Select the desired user/group from the list. Generally it is preferable to assign rights to a group and add users to the group for simplified administration. Once you have selected the desired user/group, click “OK”.

- This dialog box should now show the selected user/group. Click “OK”.

- Select the desired permissions from the list. In this case we’re just giving “Full Control” permissions for simplicity, but any set of rights can be assigned. Once the desired rights have been selected, click “OK”.

- In order to correctly limit the subfolder uncheck the box for “Include inheritable permissions…” and click “OK”. Before you do this make sure you give “Full Control” to the domain admins group or you could lock yourself out of the folder.

- If you are ready to remove inherited permissions, click “Remove”.

- The correct users/groups should now be listed on the security tab with the new permissions. If you are done editing permissions, click “OK”.
