Knowledge Base
Search by either entering keywords or by selecting a product.
Initial setup and configuration of an TeraStation 3010/3020/5010/6000
Applies to TeraStation 6000/ 5010 / 3010 / 3020 series
For more information consult the user’s guides available at
http://d.buffalo.jp/TS3410DN/
http://d.buffalo.jp/TS5410DN/
http://d.buffalo.jp/TS6400DN/
1. Setup your Buffalo NAS out of the box
2. Use Buffalo NAS Navigator to connect to the TeraStation WEBUI.
How do I install NAS Navigator?
3. Login to the WEBUI. The default password is “password”.

4. The first step is to set the administrator password. The new admin password cannot be “password”. You can skip this step and change the password later.

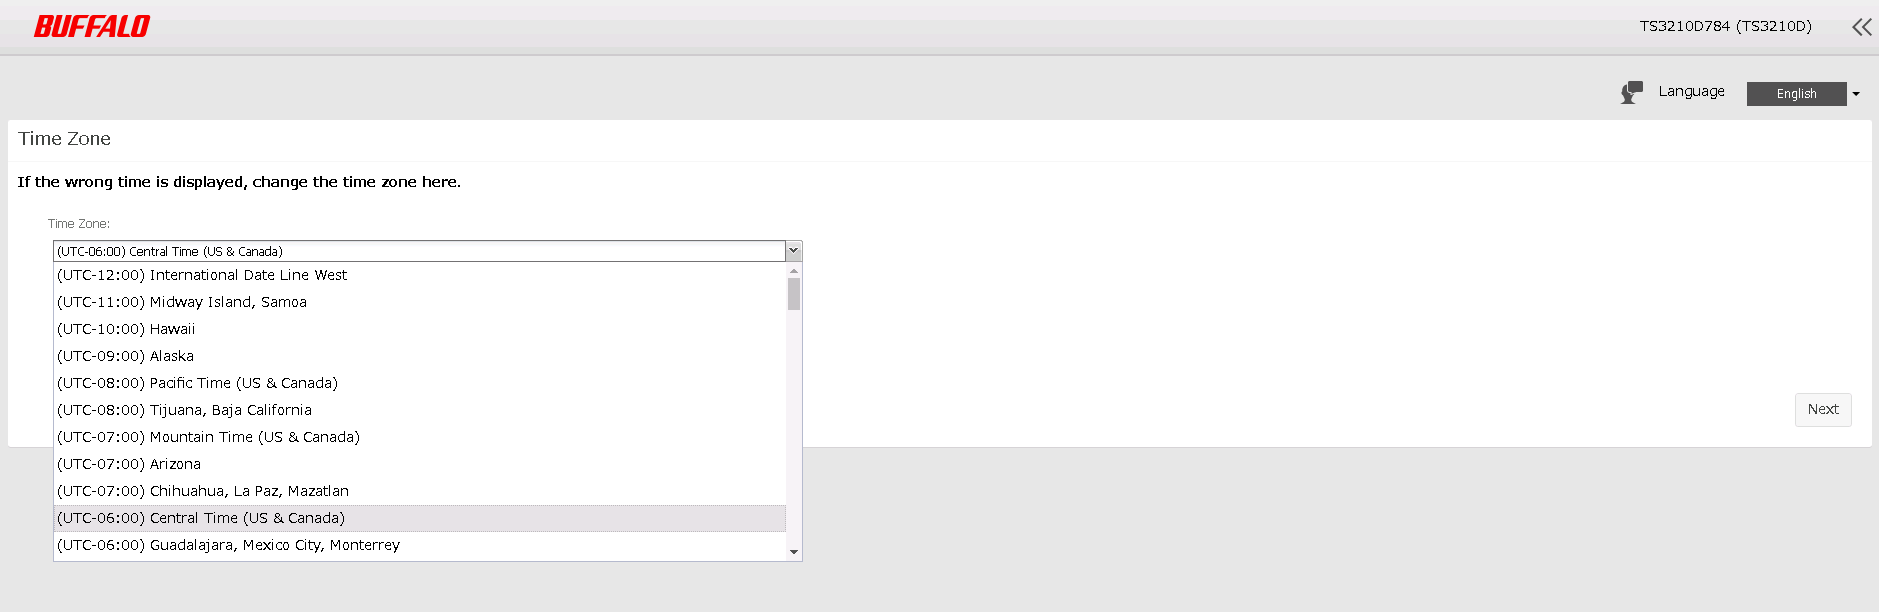
5. Select your time zone.
6. Configure the proxy server if your TeraStation is located on the network through the proxy server.

7. Configure the Remote Management Service if you are using this service. You can skip this step and configure it later.
Learn How to setup the Remote Management Service (RMS) here.

8. Select the RAID type. Select “Keep current RAID mode” to use the default array type that’s already configured out of the box.
The default RAID mode will depend on different TeraStation bay models.

9. Setup complete. Click “Close”.

10. The TeraStation UI dashboard will show up. At this point the basic configuration is complete and the TeraStation is ready for use.

For more detail configuration settings, please also check the following articles:
Configuring a static IP address on a series 3010 or 5010 TeraStation
Creating a new Shared Folder on a Buffalo TeraStation
Configuration and Usage of iSCSI Volumes on a Buffalo TeraStation
Creating a New User on a Buffalo TeraStation
Setting up subfolder permissions on a TS3010/5010 series TeraStation
search keywords: initial initialize reset reinstall restore recover